Showing posts with label gluten-free. Show all posts

Sunday, April 19, 2015

Sugar-Free Clementine Cake


My friend Shiela is very fond of the movie The Secret Life of Walter Mitty, in which, interestingly, Clementine Cake is featured prominently. After multiple viewings, she became so intrigued with the idea of this cake that she Googled it, immediately found a great recipe from The New York Times, baked it, and raved about it. I have never seen the movie, but when she described the recipe to me, I knew immediately that it was a winner, and one that I could easily adapt to sugar-free goodness. The results? Oh, this is good. The crumb is moist, the flavor intense, the crust chewy.... Excellent for breakfast or afternoon tea; full of protein and fiber. I can see making this into individual tea cakes, too....

Sugar-Free Clementine Cake

Adapted from The New York Times


  • 5 medium clementines or tangerines (1 pound)
  • Spray cooking oil
  • 6 large eggs
  • 1 cup sugar substitute (I am loving Swerve!)  
    ¼ cup melted butter
  • 1 teaspoon salt
  • 2 cups almond flour or meal (Bob's Redmill and Trader Joe's are great sources)
  • 2 teaspoons baking powder


Poached Clementines

PREPARATION

  1. Place whole unpeeled clementines in a medium-sized sauce pan, cover with cold water and bring to a boil over high heat. Reduce heat to low, cover and simmer gently for 2 hours, adding more water as needed. Remove clementines with a slotted spoon and, once cool enough to handle, halve and remove any seeds or other hard bits. Purée in a food processor, immersion or conventional blender and set aside. (May be done up to 2 days ahead and refrigerated.)
  2. Heat oven to 350 degrees. Spray a 9-inch springform pan with cooking oil, line bottom with parchment paper and spray paper with oil.
  3. In a large bowl, whisk the eggs together with the melted butter, sugar substitute, salt and clementine purée. Add the almond flour and baking powder and stir until just combined.
  4. Pour into prepared pan and bake until edges are golden brown and starting to pull away from sides of pan, about 1 hour. Transfer to wire rack set over baking sheet. After 10 minutes, run a knife around edge of pan to loosen cake; remove cake from pan. Peel off parchment paper and return cake to wire rack to cool completely. Decorate with dusting of powdered sugar or with chocolate glaze or candied clementines, or both.

Thursday, June 21, 2012

(Sugar-Free) Fresh Apricot Crostata

Sugar-Free Fresh Apricot Crostata

Apricot feast or apricot famine! Last year - famine.  This year - feast!  I went to the farmer's market and bought seconds; ripe, delicious, and cheaper than firsts. First came multiple batches of jam, then a batch of apricot liqueur. I saved all the pits, smashed them open, and put them into some organic Prairie vodka to make almond extract. (The kernel in the pit is a "bitter almond," poisonous to eat, but what almond extract is made from; it's far more almond-y than almonds are!) I was feeling pretty satisfied, the larder was full and I had enough to weather the next famine; no need for more.  But.....then my friend Kate scored yet another massive batch of organic apricots at the farmer's market; the first time she scored 25 pounds and hustled to use it all, soliciting recipes from all her friends in the longest Facebook exchange I've ever seen.  Then she scored another 36 pounds - yikes!  This time she was ready to share some, so we traded; some Artemesia Organic Blood Orange Liqueur for 10 pounds of apricots.  The ripest ones needed to be used right away, so I just went straight into jam mode.... there went five pounds.  A few more went into the jar of liqueur, with more vodka to cover.  And that left me with about 3 more pounds.  Hmmmm...... Apricot Crostata!

If you notice any similarity between this and my recipe for sugar-free Linzertorte, you are a clever and observant reader.  I changed my recipe for the dough ever so slightly (almond meal only instead of hazelnuts, a little vanilla), and the filling recipe here is essentially a quick jam recipe.  In fact, if you don't have any fresh apricots on hand, you can use some sugar-free apricot jam - preferably home-made. Both commercial varieties of sugar-free apricot jam I tried truly had no discernible flavor at all, so if that's all you have available, I would doctor the jam; see below* for instructions.

The recipe would work perfectly with cherries, using exactly the same proportions (I riffed the filling recipe off of a cherry crostata recipe in the Gourmet Cookbook.)  If you use cherries, eliminate the almond extract.

Sugar-Free Fresh Apricot Crostata
Time to add the thickener

Dough
I.
1 3/4 sticks unsalted butter, softened
3 large egg yolks
Finely grated fresh lemon zest from 1 lemon
1 tsp apple sauce
1/2 tsp vanilla

II.
1/4 cup erythritol
3 TB xylitol
6 tiny scoops stevia extract powder  (the little measuring spoon in the container)

III.

8 oz/2 fairly packed cups of almond meal
1 1/4 cups whole wheat pastry flour (spoon and sweep measuring*)
1/4 cup + 2 TB soy protein
1/2 tsp salt

Filling
1 3/4 lbs ripe, fresh apricots
3 TB unsalted butter, divided into a few pieces

1/4 cup + 3 TB erythritol
3 TB + 1 1/2 tsp xylitol
6 tiny scoops stevia extract powder

1-2 TB fresh lemon juice (I used Meyer)
2 TB kirsch
1/2 tsp almond extract

3 TB corn or tapioca starch dissolved in 1/4 cup water

Tools: a 10" tart pan with a removable bottom, a mixer

Dough Instructions:
Using your mixer, beat the butter until fluffy.  Then add the remaining ingredients from group I and beat until well combined.

Measure all of the sweeteners from group II into a small bowl and whisk to combine. Add to the butter mixture and beat until well combined.

Next, measure all of the ingredients from group III into a medium-sized bowl and whisk to combine.  Add gradually to the butter mixture until it is well mixed.  Form the dough into two equal balls, place each on its own sheet of waxed paper, and squash into large disks. Put them in the fridge to chill for at least 1/2 hour.

While the dough is chilling, make the filling:

 
Filling Instructions

Wash, dry, pit and cut the apricots into quarters. (Save the pits to make  your own almond extract!)

Add the butter to a 12" saute pan and melt over medium low heat. Add the apricots, lemon juice, kirsch and almond extract and stir to combine. While the apricot mixture cooks over medium heat, measure the sweeteners into a small bowl and whisk to combine.  Add the sweeteners to the apricot mixture and stir well.  Please note: the sweetener amount is calculated for really sweet, ripe apricots (Blenheims are sooooo delicious!) If your apricots are a little tart and under-ripe, up the sweeteners to taste, and go with the lower amount of lemon juice - perhaps even dropping it; it's there to balance the sweetness. Cook until the apricots have softened somewhat, and released their juices, about 8-10 minutes. Stir up the starch/water slurry to recombine and add it to the apricot mixture.  Cook until the whole batch thickens and no longer tastes of corn starch, about 10 minutes more. You will have a delicious, flavorful filling. Let it cool in the pan.

Meanwhile:

Remove the dough from the refrigerator to soften, and pre-heat the oven to 350 F. Put a silpat on a baking sheet, or cover it in foil, and place on the middle rack of the oven to heat.

When the dough is malleable enough to roll, remove one dough disk and set it aside so that you can use both pieces of waxed paper to roll the dough with.  (Of course you can use an additional piece of waxed paper, but I like to use as little disposable stuff as possible.) Placing one disk between two pieces of waxed paper, roll until the dough into a 12" round.  Put it in the tart pan, and press the dough up the sides of the pan. You can trim off the excess dough or fold it over to reinforce the sides of the tart.  Put it back in the refrigerator while you work on the second disk.

Using your two pieces of waxed paper, roll the second disk into another 12" round. Remove the top layer of waxed paper, and cut the round into 10 strips, each one 3/4" -1" wide. Put the whole thing on a baking sheet and put it in the fridge to firm up a bit - this makes it easier to handle - while you do the rest.

Remove the tart pan from the refrigerator, and fill it with the luscious apricot filling. You may have a tablespoon or two left over; don't over-fill the pan - it will overflow and make a sticky mess. This extra filling is the cook's treat while the tart cooks.  Well, of course. you could eat it right now, before you go to the next step; I did.

Take your dough strips out of the refrigerator, and being mindful that the outside pieces are the shortest and you will need to repeat the strips going the other way, lay the strips across the tart, either straight to make squares or on the diagonal to make diamonds.  You may need to use a spatula to remove the dough strips from the paper. Pinch the outer edges of the dough onto the dough rim in the pan and remove any excess.  Repeat going the other way.  You will likely have a few small pieces of dough; again, cook's treat. You can eat it raw, or put it on the cookie sheet to bake; it makes a tasty shortbread-like cookie. Just remember to take it out after about 10-12 minutes, or it will burn. (I've done this twice now; phooey.)

Put the tart on the heated cookie sheet in the middle of the oven, and bake for about 45 minutes to an hour, until the crust is golden-brown and the filling is bubbling.

Cool the crostata for at least an hour and a half so that you can safely remove it from the pan and cut it without it breaking.

*Special instructions for doctoring commercially made jam:  Take 1 1/3 cups apricot jam. In a medium sized sauce pan, melt the butter, then add the jam and thin it by heating it a bit. Add the almond extract, lemon juice and kirsch in the proportions shown above, and heat and stir to combine. Taste it, adjust the flavors, and follow the directions from there.


GLUTEN-FREE VERSION:

To make this recipe gluten-free, simply substitute your favorite gluten-free baking mix for the whole-wheat pasty flour. All set!


Monday, April 9, 2012

Butterscotch Pudding with Coconut Palm Sugar

Butterscotch Pudding (with vanilla bean)


Several years ago, I bought a bag of something I had never seen before from the proprietors of Coracao Confections; it was coconut palm sugar, and they were using it in their amazing line of organic, raw, low-glycemic chocolates.  Well, coconut palm sugar is now all the rage.  Dr. Oz did a segment on it on his program, promoting it as part of a weight-loss strategy (the idea being that if you evened out the highs and lows of sugar, you wouldn't get so many cravings.)

I've been using this delicious, caramel-noted sweetener in a lot of my almost sugar-free recipes; just a few spoonfuls can bring wonderful flavor and texture to the mix, boosting the flavors and texture of my sweetener trio; erythritol, xylitol, and stevia.  I was inspired in the last few weeks to invent two new pudding recipes using coconut palm sugar.  Both of them are so delicious that, frankly, I blew my own mind.

The first one uses whole cow's milk.  The second one is vegan, and uses whole coconut milk.  Either way - me-OW, that's good eats!  Just be aware that once you get started, it's very hard to stop eating this yummy stuff.  But hey, milk is full of protein and calcium, and coconut milk is very good for your immune system, and either way, it's low carb and low glycemic!


Butterscotch Pudding with Coconut Palm Sugar

Version One:  Dairy
I.
1/2 cup coconut palm sugar
1/4 tsp salt
2 TB plus 1 tsp corn starch (or tapioca starch)

II.
1 1/2 cups whole milk
1/2 cup heavy cream

III.
2 TB unsalted butter
1 tsp vanilla extract

1. In a heavy, medium-sized sauce pan, whisk the sugar, salt and starch.

2. Whisk in the milk and heavy cream. Over medium heat, whisking/stirring constantly, bring the mixture to a full boil, and then cook for one minute.

3.  Add the butter and vanilla, and stir well to combine.  Cool, pour into a heat-proof container, and chill. If you wish to prevent a "skin" from forming, you can cover the pudding with a buttered round of wax or parchment paper.

Version Two: Coconut Milk (Vegan)

I.
1/2 cup coconut palm sugar
1/4 tsp salt
2 TB plus 1 tsp corn starch (or tapioca starch)

II.
1 can of full-fat coconut milk (14 ounces)

III.

1 tsp vanilla extract


1. In a heavy, medium-sized sauce pan, whisk the sugar, salt and starch.

2. Whisk in the coconut milk. Over medium heat, whisking/stirring constantly, bring the mixture to a full boil, and then cook for one minute.

3.  Add the vanilla, and stir well to combine.  Cool, pour into a heat-proof container, and chill. If you wish to prevent a "skin" from forming, you can cover the pudding with a greased round of wax or parchment paper.

Notes:  the pudding will thicken as it cools, so don't panic if it seems thin when you have finished cooking it.   If you are really feeling expansive, you can use half of a fresh vanilla bean instead of the vanilla extract.

Thursday, January 26, 2012

More Meatballs: Your Choice - Lamb, Pork or Beef

Lamb Meatballs

I am in love with the lamb meatball recipe from Nigella Lawson that I found online.  I am so in love with it that I went right ahead and invented a new version of them within days of having made the lamb meatballs, using ground pork.  Of course, having just purchased a whole steer from my rancher friend Mary Pettis-Sarley barngoddess@dishmail.net, I had a whole shelf in the freezer full of the best hamburger ever. I had to design beef meatballs. 

What is it about these that makes them so very, very good?  I believe it's the use of semolina flour.  Semolina, a special variety of high-gluten wheat, is typically used to make pasta.  I keep it on hand for use in gnocchi a la Romana. In the Bay Area, you can purchase it in a well-stocked grocery store such as Country Cheese or Berkeley Bowl.  However, if you can't find it or don't have it on hand, panko (Japanese breadcrumbs), or regular breadcrumbs ought to do just fine.

Unlike many meatball recipes, which call for dipping the meatballs in egg and then breading them, this one just calls for mixing in the semolina and allowing the mix to sit while the semolina absorbs the moisture in the meat and egg, followed by pan-frying.  They fry up beautifully; crispy on the outside, tender in the middle.  Yummy.

Pork Meatballs Frying - they are as delicious as they look!


Pork Meatballs

1 lb ground pork
1 tsp salt
1 tsp fresh ground black pepper
1/2 tsp ground nutmeg/ 1/2 of a nutmeg, ground
2-3 cloves minced/pressed garlic
3 TB semolina (or breadcrumbs or panko if you can't find it)
OR 2 TB coconut flour (low carb)
1 large egg, lightly whisked

makes 16 meatballs

Lamb Meatballs:  Nigella Lawson

1 lb ground lamb
1 tsp salt
1/4 cup finely chopped scallions or finely chopped yellow onion
1/2 teaspoon ground cinnamon
1 teaspoon ground cumin
1 teaspoon ground allspice
3 tablespoons semolina
OR 2 TB coconut flour (low carb, high fiber)
1 large egg, lightly whisked

Beef Meatballs
1 lb beef
1 tsp salt
1/2 tsp cinnamon
1 tsp freshly ground black pepper
1/4 tsp cumin
1/2 freshly grated nutmeg
3 TB semolina (or breadcrumbs or panko if you can't find it)
OR 2 TB coconut flour (low carb, high fiber)
1 large egg, lightly whisked
 2-3 cloves garlic
1/4 cup finely chopped scallions and/or finely chopped yellow onion


For either recipe, combine all of the ingredients well, mixing with your hands to make sure that the spices are evenly distributed.  Allow the mixture to sit for half an hour, then form into 16 or so meatballs and place them on a large plate.  (Wetting your hands to prevent the meat from sticking to your hands as you roll them works well, as does using disposable food service gloves.)

When they are all rolled, heat up about 1-2 TB of olive oil or drippings in a large, cast iron or other heavy skillet over medium high heat.  When the oil is hot, add the meatballs.  Be careful not to crowd them; crowding causes them to cook up grey rather than crispy and brown.  If you have a very large pan, you can do them all in one batch.  Otherwise, you can use two frying pans or fry them in batches.  Cook them until crispy and brown, then turn and repeat on all of the sides.  Serve them with well seasoned brown rice.

For an easy pan sauce for the lamb meatballs, squeeze the juice of one half of a fresh Meyer lemon into the frying pan, combine well with the drippings, and serve over brown rice, bulgur wheat or couscous.

Thursday, January 19, 2012

Fudgy Rich Chocolatey Gluten-Free, Sugar-Free, Low-Carb Brownies

Just in case you need to be sugar-free AND gluten-free, here is a recipe that is sure to please.  It will surely please you, the sadly deprived baker (although you cannot possibly feel deprived when eating one of these luscious, moist, chocolatey treats.)  And it will just as surely please anyone else who eats one, whether or not they have to abstain.

Last night I made the maiden batch of these brownies for a school potluck.  (Naturally, I ate one first to make sure it was of the highest quality.) It was immensely gratifying to be able to offer one to a friend at the potluck who is actually allergic to sugar, as well as to those who are gluten intolerant; something for everyone!

And as with all of my recipes, it is super high-protein and super low-carb.  How satisfying is that?

5 oz sugar-free, sweetened dark chocolate, coarsely chopped
2 oz unsweetened chocolate, coarsely chopped
1 stick (4 oz) unsalted butter

1/2 cup erythritol
1/3 cup xylitol
7 tiny scoops stevia extract powder

2 TB unsweetened applesauce
2 large eggs
1 tsp vanilla extract

1 pinch xanthan gum
1/2 tsp salt
2 TB quinoa flour or gluten-free baking mix
2 TB soy protein
2 TB unsweetened, unflavored whey powder
1 TB almond meal

1 cup walnut meats - optional


1. Preheat oven to 325 degrees Fahrenheit, and put rack in the lower third of the oven.


2. Line a 9" square baking pan with foil, letting the ends of the foil run up the sides and hang over the edges of the pan.  Do not butter or flour the pan.

3. If using walnuts, spread them on a baking sheet and toast them in the oven until lightly toasted and
 fragrant, 7-10 minutes.  Cool them and chop coarsely.

4. In a small bowl, combine all the sweeteners and whisk to combine.

5.  In another small bowl, combine the flours and salt and whisk to combine. 

6. In a medium-sized saucepan, combine the chocolates and butter and melt over low heat, stirring frequently to prevent scorching.

7. When melted, remove mixture from the heat, and stir in the sweeteners and vanilla, until well-combined.

8. Stir in the applesauce, then stir in one egg at a time until well-combined.

9.  Stir flour mixture into the chocolate mixture until well-combined.


10. Add the walnuts, (if desired) and stir well.

11. Pour the batter into the prepared pan, on top of the foil, using a spatula to scrape all of it out of the pot and into the pan.  Spread evenly in the pan.

12. Put pan on a rack in the lower third of the oven and bake until the surface is glossy and smooth, and a toothpick comes out fairly clean from the center, about 40 minutes.  (A few crumbs may stick to it; that's okay.)

12. Cool brownies in the pan, on a rack.  Use the foil to remove the whole batch from the pan when cool.  Cut into squares of the size you desire (keeping in mind that these are rich.)

Brownies will keep in an air-tight container for several days.  Well, theoretically.  

Notes:  You can get pretty darned good sugar-free dark chocolate at Trader Joe's, sweetened with maltitol.  This has become my go-to baking bar, because the price is very good for decent chocolate.  Bob's Red Mill makes all of the other flours, and you can buy them in a well-stocked health food store.  (We can buy them in bulk at Berkeley Bowl or Berkeley Natural Grocer.)  If you want to, you can substitute 1/2 cup of whole wheat pastry flour instead.

Sweeteners:  Erythritol and xylitol are sugar alcohols; low-glycemic, low-calorie, sweeteners suitable for use by diabetics or those with metabolic disorders.  You can easily buy xylitol  at a well-stocked grocery or health-food store.  Erythritol is more readily available on-line.  Stevia is a natural sweetener extracted from the stevia leaf.  It is readily available at grocery stores, including at Trader Joe's.

Monday, October 17, 2011

Super-Rich Chocolatey Gooey Gluten-Free Brownies

Super-Rich Chocolatey Gooey Gluten-Free Brownies

As I've mentioned, my friend Nina has suddenly had to go gluten-free.  This has led me to just as suddenly start designing a few gluten-free recipes, and it's been interesting to see how the two cooking styles intersect.  On Saturday morning, I decided to invent a gluten-free brownie recipe for her.  While they were baking, I went straight into using a different recipe outline to make sugar-free brownies.  When the gluten-free brownies came out of the oven, I cut them and removed them from the pan, lined the pan with foil, poured in the sugar-free brownie batter, and put the pan back into the still-hot oven.   Both brownie batches landed in the ideal brownie zone; gooey, rich, fudge-y, delicious....  Requests for both recipes are already coming in from my official taste-testers. I guess next I'll have to try gluten-free, sugar-free brownies; there's no reason why the sugar-free recipe couldn't be made with gluten-free flours!


Super-Rich Chocolatey Gooey Gluten-Free Brownies

2 oz unsweetened (bakers') chocolate, coarsely chopped
1 stick (8 oz) unsalted butter, cut into smaller pieces

1 cup sugar
1/2 tsp pure vanilla extract
1/4 tsp salt

2 large eggs


1/4 cup gluten-free baking mix
1 pinch xanthan gum

1 cup walnut meats - optional


1. Preheat oven to 325 degrees Fahrenheit, and put rack in the lower third of the oven.


2. Grease and "flour" an 8" square baking pan.

3. If using walnuts, chop coarsely.

4. In a medium-sized saucepan, combine the chocolate and butter and melt over low heat, stirring frequently to prevent scorching.

5. When melted, remove mixture from the heat, and stir in the sugar, vanilla, and salt, until well-combined.

6. Stir in one egg at a time until well-combined.

7. Stir in the flour and xanthan gum until well-combined.

8. Add the walnuts, (if desired) and stir well.

9. Pour the batter into the prepared pan, using a spatula to scrape all of it out of the pot and into the pan.  Spread evenly in the pan.

10. Put pan on a rack in the lower third of the oven and bake until the surface is glossy and smooth, and a toothpick comes out fairly clean from the center, about 40 minutes.  (A few crumbs may stick to it; that's okay.)

11. Cool brownies in the pan, on a rack.  Cut into squares of the size you desire (keeping in mind that these are rich.  Think of how virtuous you will feel when you have seconds if they were tiny to start with.)

Brownies will keep in an air-tight container for several days.  Well, theoretically.  

Notes: You can buy a gluten-free baking mix from Bob's Red Mill or other vendor, or just substitute a gluten-free flour, such as brown rice or buckwheat.  Xanthan gum is an emulsifier, also available from Bob's Red Mill.

(This recipe calls for an 8" pan; I had only a 9" pan, so I cooked the brownies for a few minutes less.  If you do not have an 8" pan, adjust your timing accordingly.)

Tuesday, October 4, 2011

Gluten-Free (Super High Protein) Peanut Butter Cookies

Gluten-Free Peanut Butter Cookies


My dear friend Nina has suddenly been forced to go gluten-free, and she reports that virtually all of the gluten-free commercial products she's tried are dreadful.  Frankly, I don't know what I'd do if I had to go gluten-free in addition to having to go low-carb; using vital wheat gluten is a - well, vital aspect of my low-carb, high protein baking strategy!

However, as I prepared to make her a yummy treat and looked over other people's gluten-free recipes out there, I realized that a large number of my recipes could be easily adapted to be gluten-free; I've already replaced most of the gluten-laden ingredients with protein, so it wouldn't be hard to just replace the rest with a gluten-free flour.

Frankly, these peanut butter cookies are amazing.  Let me say that again:  these cookies are FREAKING AMAZING.  Party on, gluten-free friends!


Gluten Free (Super High Protein) Peanut Butter Cookies
Dough Balls
makes about 26 cookies

1 1/2 cups creamy, unsweetened, salted organic peanut butter (not "natural")
1 stick salted or unsalted butter, (4 ounces) softened

1 large egg
2 TB applesauce
2 tsp vanilla

1 cup dark brown sugar

OR:
1/4 cup plus 2 TB xylitol
1/2 cup erythritol
7 tiny scoops stevia
1/4 cup + 2 TB coconut palm sugar, or 1/4 cup brown sugar


3 TB flax meal
6 TB soy protein powder
2 TB unsweetened whey powder
3 TB almond meal
3/4 cup gluten-free flour baking mix
1 tsp baking powder
1/2 tsp salt
1/2 tsp xanthan gum

optional, but recommended: 6-8 ounces chocolate bars, either sugar-free or not, broken into big chunks, or jam of your choice (strawberry is especially yummy with peanut butter)


1. preheat the oven to 350 degrees F

2. If using my special sugar-free sweetener blend, in a small bowl, measure all the sweeteners and whisk to combine.

3. Measure the protein powder, whey powder, flax meal, and almond meal and put into a medium sized bowl. Using the "spoon and sweep" method (spoon the flour loosely into the cup until full, then scrape off excess with a knife) measure the flour and add to the other flours. Add the salt, baking powder, and xanthan gum and whisk to combine.

4. Place the peanut butter and butter in a mixing bowl and cream until it is very smooth, scraping down the sides of the bowl periodically.  (I use the paddle attachment.)

5. With a spatula, scrape down the sides of the bowl. Add the egg, vanilla and applesauce and mix until just combined.

6. Scrape down the sides of the bowl and add the sugar or sweeteners, process until well combined.

7. Scrape down the sides again and add the dry ingredients to the wet ingredients, mixing until well combined, scraping down the sides of the bowl to make sure it is all incorporated. You will have a very dense dough.

8. Using your hands or a spoon, make balls of dough and place them about 1 1/2" apart on the cookie sheet. You can make the cookies as big or small as you like (Don't worry, they don't run at all.) You can fit 12 to 15 medium-sized cookies on a sheet pretty easily. Using a fork, carefully press the balls flat from both directions, leaving the characteristic crosshatch mark on the surface, OR press with your thumb to make an indentation to hold the jam or chocolate.  If the dough balls break apart, just squeeze them back together with your fingers.

9. Place the optional - but highly desirable - chocolate on the surface of each cookie, or a scant 1/2 teaspoon of jam. (The jam can melt and run, so don't get carried away.)

10. Bake the cookies until they are just golden underneath, and slightly puffed, 12 to 15 minutes or so. Using a spatula, put on a rack until cool (or cool on the cookie sheet). Repeat until you have baked all of the dough.

Monday, May 2, 2011

Flourless Chocolate Cake


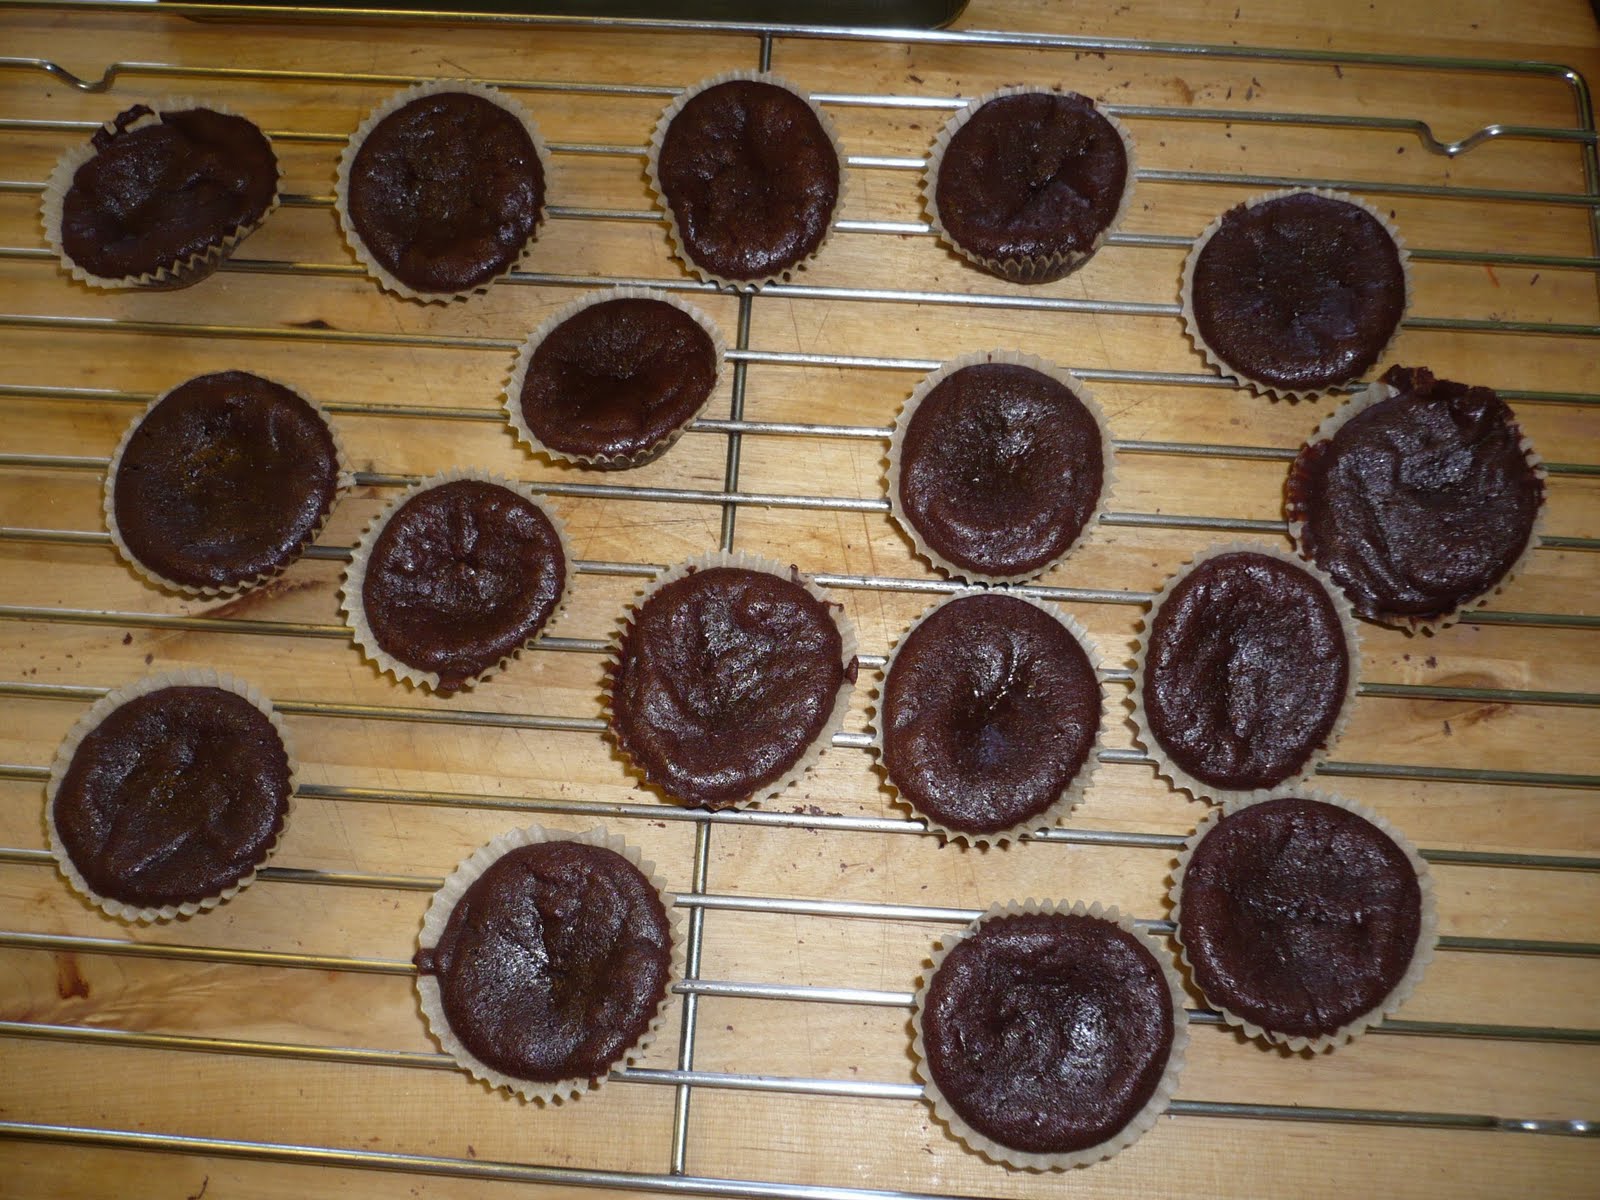
It's Teacher Appreciation Week at Johanna's school. Naturally, I agonized; the new peanut butter cookies I'm developing, (next post!) mini - breakfast cheesecakes? I've been eying this flourless chocolate cake recipe in Gourmet Cookbook for a while, after my friend Kate brought it to my attention. The recipe calls for making it in a springform pan, but since I'm baking for 30+ teachers, aides, staff, librarians and such, it had the potential for a big messy scene, where 10 people got a piece and 20 didn't. So, I thought I'd try little muffin cups and pray it wasn't a disaster. Hurray! It worked perfectly; 41 cute lil' bites, instead of one big cake. (p.s. Top Secret tip: this is spectacularly delicious, but incredibly easy. This is a perfect "company" cake, or to bring to a party!)


Flourless Chocolate Cake

from The Gourmet Cookbook

serves 10-12 in full-sized slices, makes about 40 mini-cupcake bites

8 oz good quality bittersweet chocolate (not unsweetened) coarsely chopped
1/2 pound (2 sticks) unsalted butter
1 1/2 cups sugar
6 large eggs
1 cup unsweetened cocoa powder, plus additional for dusting

Special Equipment: a 10" (26 centimeter) springform pan, or paper muffin cups and 2 muffin pans

1. Put a rack in the middle of the oven and preheat to 350 F. If using the springform, butter it, lie with parchment paper, and butter the paper. If using muffin cups, place them in your muffin tins. You can cook in batches if you have more batter than muffin tins.

2. Melt chocolate with butter in a medium metal bowl set over a saucepan of barely simmering water, stirring until smooth.

3. Remove bowl from heat, and whisk in sugar.

4. Add eggs one at a time, whisking well after each addition.

5. Sift the cocoa powder over the chocolate mixture and whisk until just combined.

6. Pour the batter into the pan, or spoon into the muffin cups.

7. Bake until top has formed a thin crust and a wooden pick or skewer inserted in the center comes out with moist crumbs adhering to it, 30-40 minutes for the big cake. Mini-muffins took about 15 minutes, so larger muffins would probably take 20-25.

8. Cool cake in the pan on a rack for 10 minutes, then remove the side of the pan. Invert the cake onto a plate and reinvert onto rack to cool completely. Dust cake with cocoa powder just before serving.