Showing posts with label raspberry. Show all posts

Thursday, May 17, 2012

Sugar-Free (Low-Carb) Linzertorte

Sugar-Free Linzertorte


Mmmm.... Linzertorte. I can't think of anything tastier just now. But perhaps you are wondering what it is? Linzertorte is a classic Viennese pastry; a rich, buttery dough with lots of toasted ground hazelnuts, pressed into a tart pan, topped with raspberry jam, and then criss-crossed with a lattice of more of the dough. The rich dough balances the sweetness of the jam, the tart sweetness of the jam does the same for the dough.  This recipe calls for lemon zest in the dough, which adds yet another layer of contrast and brightness.  Oh my.

Another beauty of Linzertorte is that it is very easy to make, but looks and tastes like you had to go to culinary academy to master it.  Love it! Make this the next time you really want to impress your guests.... or when you just want a really good treat.


Sugar-Free (Low-Carb) Linzertorte
Toasted Hazelnuts

6 1/2 ounces of hazelnuts
1 3/4 sticks unsalted butter, softened
3 large egg yolks
1 tsp apple sauce
1 TB finely grated lemon zest

1/4 cup erythritol
2 1/2 TB xylitol
4 scoops stevia
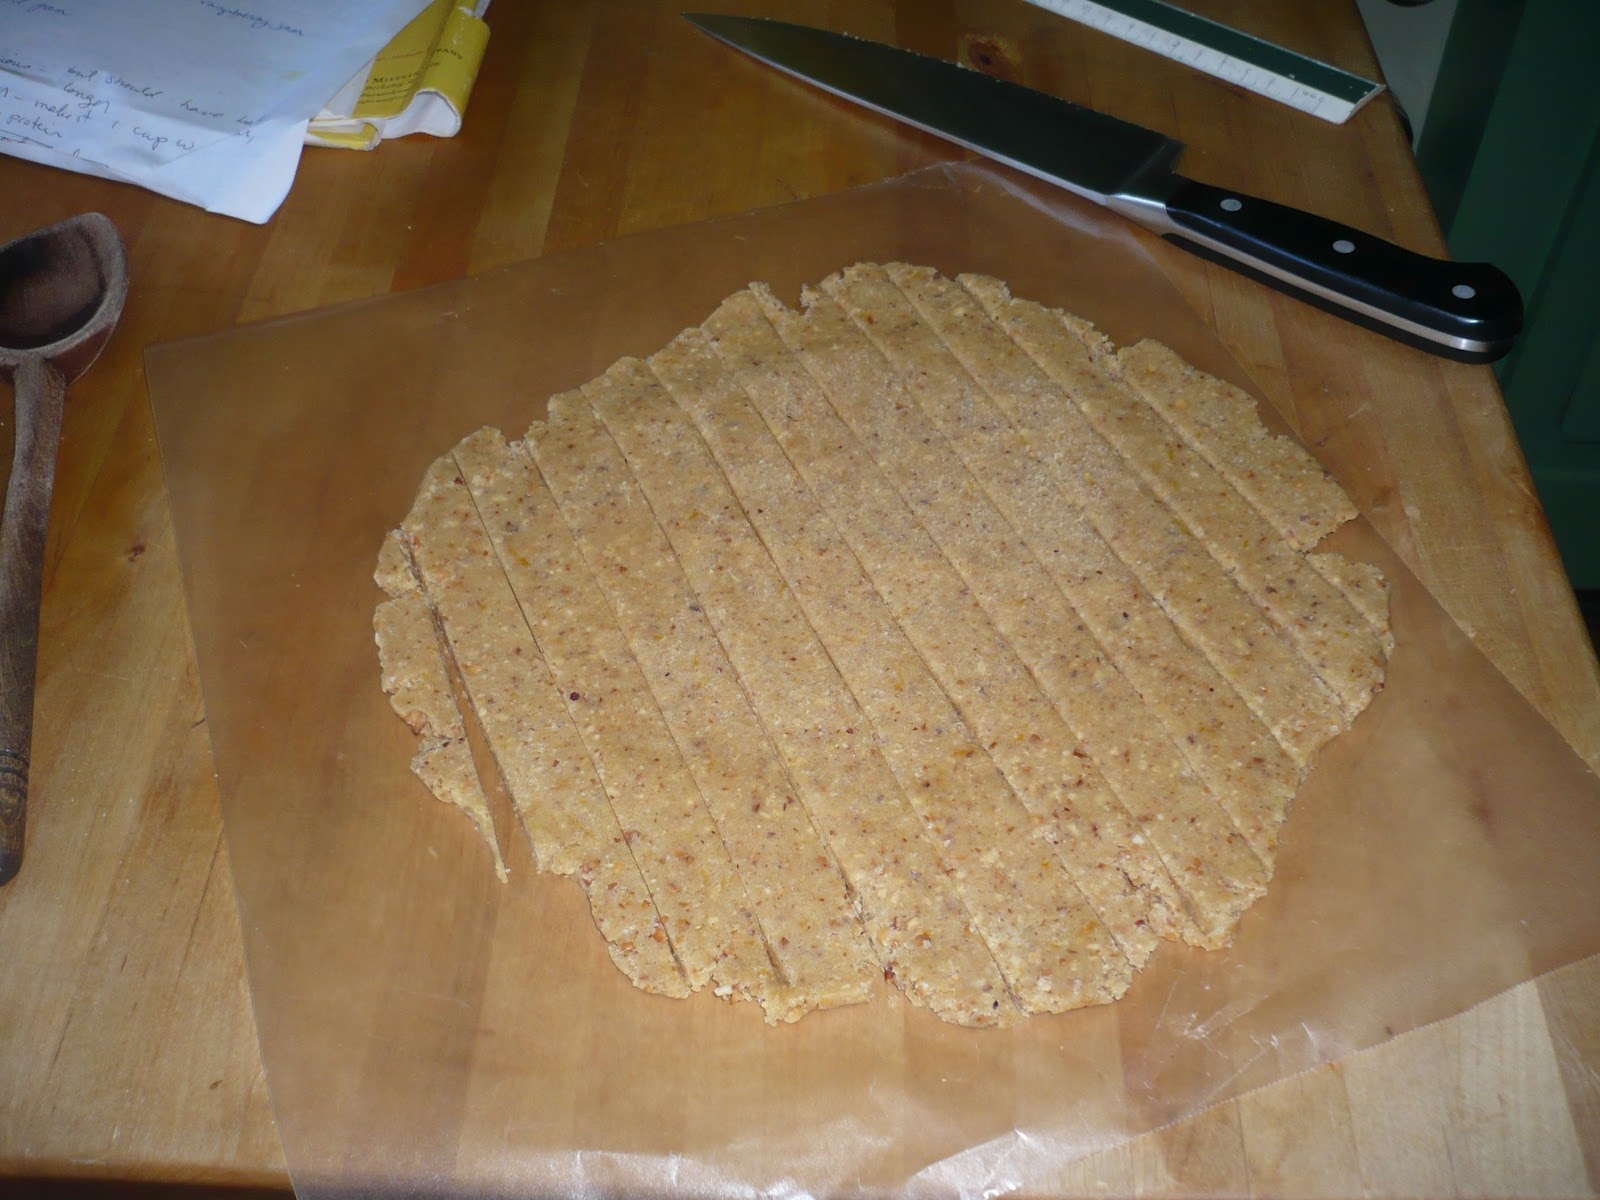
Dough Strips
1/4 tsp salt
1 1/4 cups whole wheat pasty flour
1/4 cup + 2 TB almond meal
1/4 cup + 2 TB soy protein

1 1/3 cups sugar-free raspberry jam

Equipment: a 9" tart pan (or springform)
A food processor or grinder for the nuts
A mixer

1. Toast and skin the hazelnuts.  (Spread them on a baking sheet in a pre-heated, 350 F oven. Toast for about 10 minutes, until they are golden and aromatic. Cool them. A few handfuls at a time, put them in a tea towel and rub them together to rub off the skins.)  Discard the skins.

2. In a food processor, grind the hazelnuts until they are a fine meal - but be careful not to turn them into nut butter.

3. In a small bowl, combine the sweeteners and whisk to combine well.

4. Measure the various flours, nut meals and salt into a medium bowl; use the "spoon and sweep" method to measure the whole wheat pastry flour (spoon the flour into the dry measuring cup, sweep off the excess with the back of a knife. This ensures that you don't accidentally use compacted flour, which throws off the proportions.)  Whisk to combine.

5. Using your mixer, cream the butter and sweeteners together at high speed until light and fluffy.  Add the applesauce, then add one egg yolk at a time and beat just to combine. Add zest and beat until just combined.

6. Beat in the flour/nut meal mixture until well combined. The dough will be stiff.

7. Take the dough out of the bowl and divide into two even balls. Wrap them in waxed paper and press into disks. Refrigerate for about 1/2 hour; if much longer, you will need to soften the dough up a bit to work it. (You can make the recipe up to this point a day in advance; just allow enough time for the dough to soften.)

8. Remove the dough from the refrigerator. Preheat the oven to 375 F.

9. Place one disk of dough in the bottom of the 9" tart pan.  Using your fingers (and perhaps the back of a wooden spoon) press the dough evenly all over the base of the pan and all the way up the sides. Add the jam and smooth it over the bottom.

10. Take the second disc of dough and place it between two sheets of wax paper. Roll it into an even circle that is slightly bigger than the 9" pan.  Slice the circle into strips 1/2" wide. Transfer half of the strips one at a time to the top of the tart, arranging the strips 1" apart from each other, and pinching the ends onto the sides of the bottom dough. (This takes a little planning; remember that you will need the longest strip for the center, and that you will need to match it going the other way - don't use up the long ones on the short sections!) Turn the tart sideways and repeat going the other way, making a simple cross lattice.  Pinch all of the ends, or use a fork, to attach the strips to the sides of the dough.
Finished tart before it goes in the oven


11.  Place the tart on a baking sheet and put it in the lower center of the pre-heated oven.  Bake until quite golden, about 30 minutes.  Remove from the oven, cool on a rack for an hour  or more, then carefully push the bottom plate up through the center ring to remove the side ring of the pan. Place the tart on a large plate.

12. Slice in very small pieces, as this is very rich.  Lovely with coffee, delicious for dessert, afternoon tea, or even breakfast. (Yum.)

Notes: Jam - you can make your own sugar-free raspberry jam, as I did.  Or, you can buy a pretty good xylitol sweetened jam made by Nature's Hollow, which I found at our local natural foods store.  Xylitol USA also offers a decent version, also sweetened with xylitol, and sold through their website.


Sunday, September 18, 2011

Sugar-Free Raspberry Jam

Sugar-Free Raspberry Jam in a Sugar-Free, Low-Carb Linzertorte
                                  
 
Red raspberry jam is such a lovely treat on toast.  It is also a vital component in the classic Austrian pastry called Linzertorte.  

I had a yen for Linzertorte, so I decided to splurge and make a small batch of raspberry jam.  The jam was delicious.  The resulting Linzertorte was amazing - and with one torte the jam was all gone!  Of course, I had to make more jam so I could make more Linzertorte...

The Linzertorte recipe will follow, after I've had a chance to make another one and perfect the recipe.  Meanwhile, summer is here - we'd better make the jam while we can!


As always, check the proportions in your low-sugar pectin package; I used Pomona Pectin, an apple derived pectin made especially for low-sugar or sugar-free jam.

Sugar-Free Raspberry Jam

4 1/2  cups mashed organic red raspberries (about 8 small baskets)
2 1/4 tsp calcium water (Pomona Pectin - an activator for the pectin)

2 1/4 tsp low-sugar pectin
1 1/4 cup erythritol+ 2 TB
2/3 cup xylitol
14 tiny scoops stevia powder

yield:  2 pint jars plus 3 half pint jars

1. If the jars are brand new, wash them and the rings and lids to remove any chemicals left from processing. If they have been sitting in the basement, check them for dust, and wash off any you find. Put the jars and rings into a stockpot or canning pot and fill with hot water to cover by an inch or two. Put them on the rear burner of the stove over high heat and bring them to a boil. When they come to a boil, turn the heat down and keep them hot and ready.  Be sure to scald the wide-mouthed funnel and ladle, too. 

2.  Following the instructions in your low sugar pectin kit, make calcium water. (I use Pomona brand.)


3.  Pick over the berries and remove any that are moldy.  Put the rest into a large measuring cup, and mash them well.  Use the amount of mashed fruit you have to determine how much calcium water, pectin, and sweeteners to use. 

4.  Put the raspberries and calcium water into a saucepan big enough to comfortably accommodate the whole batch.  Don't fill the pan too close to the top.  Bring the fruit to a boil over medium low heat, stirring frequently to prevent scorching.

5.  Meanwhile, measure the sweeteners and the pectin into a medium sized bowl and whisk them all well to combine.

6.  When the fruit comes to a full boil, get a long-handled wooden spoon ready, and gradually add the sweetener mix to the hot fruit, stirring constantly as you pour in the sweeteners. Stir well and frequently to dissolve the pectin and sweeteners and prevent lumping. Bring it back to a full boil. When it looks lovely and thick, turn off the heat and get ready to can. (Don't worry if it isn't as thick as jam; it thickens as it cools.)

7.  Clear a good sized work surface near the stove, and cover it with clean dishtowels (preferably ones you don't care about!)

Turn the heat off under the pot of jars and move it to the front of the stove so you can reach them easily, and move the jam to the back of the stove so you don't get water into it by accident. (Put the lid on the pot if necessary.) Using tongs or a jar lifter in your dominant hand, and a clean dishtowel in your other hand, carefully remove the lids and rings and drain them on the towels. Lift each jar out of the hot water, dump the hot water back into the pot, and carefully guide and transport the hot jar over to the towels. Turn it upside down to drain out the extra water. Repeat until all of the jars are drained and ready.

Turn the heat back on high underneath the pot that the jars came out of, and bring it back to a full boil while you can the jam.

Now, again using your tongs (or a clean towel, oven mitts, or tough hands!) turn the jars right side up, and line them up to be ready to fill. If you have a wide-mouthed jar funnel (which I so highly recommend - available at any good hardware store, Bed Bath and Beyond, well stocked grocery stores, etc., for less than $5) put it on top of one of the jars.

Grab your best ladle, and bring the pot of hot jam over to your work surface. Carefully fill each jar, leaving 1/4" of space at the top. If you have a wide-mouthed funnel, the bottom should come to just the right spot. If you don't, do your best! If necessary, spoon some out to reach the right level. After you have filled all your jars, use a clean, moist towel to wipe the ring area and the top surface of the jars clean. If you have less than a full jar of jam, put that one straight into use and don't bother to can it.

Put the lids on, followed by the screw tops, and screw them down.

 8.  Bring the pot of water back to a full boil, and carefully return the full jars of jam to the pot.  You may have to remove some of the water, as full jars displace more water than empty ones.  Bring the water back to the boil again, and boil for 10 minutes.

9.  Remove the jars and let them cool on the towels.


Notes from Christine:

"What's with all of these obscure sweeteners?" Erythritol and Xylitol are sugar alcohols; super low-glycemic, super low-calorie, super low-carbohydrate, and good for your teeth.  

Xylitol is a little sweeter than cane sugar, has a fairly neutral flavor with a little bright, almost pepperminty quality, and can be found easily at a well-stocked health food store or really good grocery store.

Erythritol, very neutral in flavor, is about 60% as sweet as sugar, and is very difficult to find in stores, except in individual packets. As it is 60% as sweet as sugar, it takes quite a bit more to reach the right level of sweetness in a recipe, and this makes proportions difficult.  However, its very neutral profile makes it a natural for blending with xylitol and stevia, especially since stevia is so highly concentrated.  It's worth tracking it down by mail-order, or you could make a special request to a grocer to order some for you.

Stevia is a natural, calorie-free leaf extract, super concentrated and very sweet, but with a weird, bitter aftertaste and no volume; due to its highly concentrated state, one teeny-tiny scoopful (which comes in its container) is equal to a teaspoon of sugar. It is easily purchased at Trader Joe's or any grocery store.

Be aware that some Xylitol and Erythritol brands in American packaging are actually imported from China and repackaged. That is why I buy all of these directly from Xylitol USA, http://www.xylitolusa.com/ which manufactures them from North American sources.