Showing posts with label high-protein. Show all posts

Thursday, May 17, 2012

Sugar-Free (Low-Carb) Linzertorte

Sugar-Free Linzertorte


Mmmm.... Linzertorte. I can't think of anything tastier just now. But perhaps you are wondering what it is? Linzertorte is a classic Viennese pastry; a rich, buttery dough with lots of toasted ground hazelnuts, pressed into a tart pan, topped with raspberry jam, and then criss-crossed with a lattice of more of the dough. The rich dough balances the sweetness of the jam, the tart sweetness of the jam does the same for the dough.  This recipe calls for lemon zest in the dough, which adds yet another layer of contrast and brightness.  Oh my.

Another beauty of Linzertorte is that it is very easy to make, but looks and tastes like you had to go to culinary academy to master it.  Love it! Make this the next time you really want to impress your guests.... or when you just want a really good treat.


Sugar-Free (Low-Carb) Linzertorte
Toasted Hazelnuts

6 1/2 ounces of hazelnuts
1 3/4 sticks unsalted butter, softened
3 large egg yolks
1 tsp apple sauce
1 TB finely grated lemon zest

1/4 cup erythritol
2 1/2 TB xylitol
4 scoops stevia
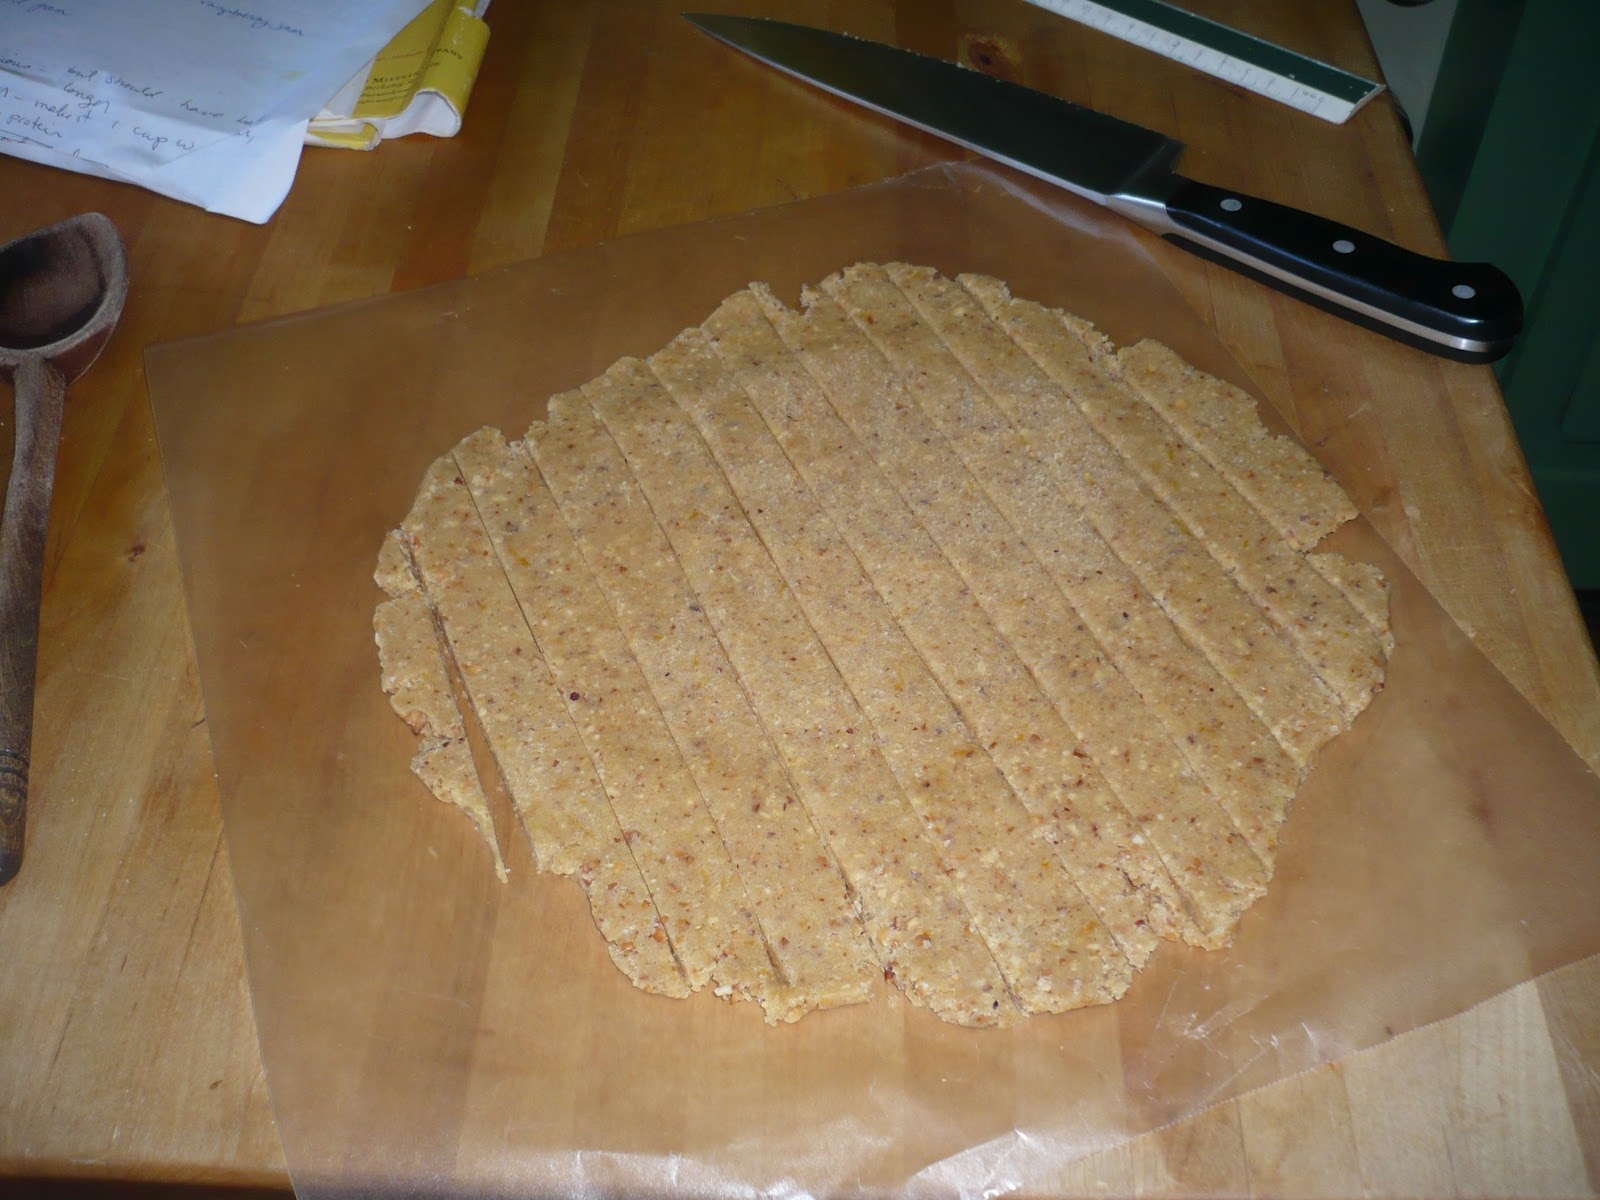
Dough Strips
1/4 tsp salt
1 1/4 cups whole wheat pasty flour
1/4 cup + 2 TB almond meal
1/4 cup + 2 TB soy protein

1 1/3 cups sugar-free raspberry jam

Equipment: a 9" tart pan (or springform)
A food processor or grinder for the nuts
A mixer

1. Toast and skin the hazelnuts.  (Spread them on a baking sheet in a pre-heated, 350 F oven. Toast for about 10 minutes, until they are golden and aromatic. Cool them. A few handfuls at a time, put them in a tea towel and rub them together to rub off the skins.)  Discard the skins.

2. In a food processor, grind the hazelnuts until they are a fine meal - but be careful not to turn them into nut butter.

3. In a small bowl, combine the sweeteners and whisk to combine well.

4. Measure the various flours, nut meals and salt into a medium bowl; use the "spoon and sweep" method to measure the whole wheat pastry flour (spoon the flour into the dry measuring cup, sweep off the excess with the back of a knife. This ensures that you don't accidentally use compacted flour, which throws off the proportions.)  Whisk to combine.

5. Using your mixer, cream the butter and sweeteners together at high speed until light and fluffy.  Add the applesauce, then add one egg yolk at a time and beat just to combine. Add zest and beat until just combined.

6. Beat in the flour/nut meal mixture until well combined. The dough will be stiff.

7. Take the dough out of the bowl and divide into two even balls. Wrap them in waxed paper and press into disks. Refrigerate for about 1/2 hour; if much longer, you will need to soften the dough up a bit to work it. (You can make the recipe up to this point a day in advance; just allow enough time for the dough to soften.)

8. Remove the dough from the refrigerator. Preheat the oven to 375 F.

9. Place one disk of dough in the bottom of the 9" tart pan.  Using your fingers (and perhaps the back of a wooden spoon) press the dough evenly all over the base of the pan and all the way up the sides. Add the jam and smooth it over the bottom.

10. Take the second disc of dough and place it between two sheets of wax paper. Roll it into an even circle that is slightly bigger than the 9" pan.  Slice the circle into strips 1/2" wide. Transfer half of the strips one at a time to the top of the tart, arranging the strips 1" apart from each other, and pinching the ends onto the sides of the bottom dough. (This takes a little planning; remember that you will need the longest strip for the center, and that you will need to match it going the other way - don't use up the long ones on the short sections!) Turn the tart sideways and repeat going the other way, making a simple cross lattice.  Pinch all of the ends, or use a fork, to attach the strips to the sides of the dough.
Finished tart before it goes in the oven


11.  Place the tart on a baking sheet and put it in the lower center of the pre-heated oven.  Bake until quite golden, about 30 minutes.  Remove from the oven, cool on a rack for an hour  or more, then carefully push the bottom plate up through the center ring to remove the side ring of the pan. Place the tart on a large plate.

12. Slice in very small pieces, as this is very rich.  Lovely with coffee, delicious for dessert, afternoon tea, or even breakfast. (Yum.)

Notes: Jam - you can make your own sugar-free raspberry jam, as I did.  Or, you can buy a pretty good xylitol sweetened jam made by Nature's Hollow, which I found at our local natural foods store.  Xylitol USA also offers a decent version, also sweetened with xylitol, and sold through their website.


Sunday, October 16, 2011

Double Chocolate Super-Rich Utterly Delicious (Sugar-Free, High Protein, Low Carb!) Brownies

Double Chocolate Super-Rich Utterly Delicious (Sugar-Free, High Protein!) Brownies

 I have yet to meet anyone who dislikes brownies.  Chocolate and butter barely held together with flour; what on earth is there to dislike? In the course of my brownie research, I read a quote that there were as many brownie recipes as daisies in the field.  So true; there is infinite variety, from the amount of chocolate and butter, to the number of eggs and the amount of flour, to the size of the pan.

There are those who like them cake-y, and those who like them fudge-y.  I'm a fudge-y person, myself.  If I want cake, I'll make a cake!  Back in the day when I used to use brownie mixes (which really aren't bad) I used to half-bake them to get them the way I like them; downright goopy in the middle!

When I am inventing a new sugar-free recipe, sometimes it takes a few tries to get the recipe right.  You know, one where nobody knows it's sugar-free but the baker.  This one is spot-on.  Fudge-y, dense, rich goodness.  Oh yeah.  You're going to like this one!

Double Chocolate Super-Rich Utterly Delicious (Sugar-Free, High Protein, Low Carb!) Brownies

5 oz sugar-free, sweetened dark chocolate, coarsely chopped
2 oz unsweetened (bakers') chocolate, coarsely chopped
1 stick (8 oz) unsalted butter, cut into smaller pieces

1/2 cup erythritol
1/3 cup xylitol
7 tiny scoops stevia extract powder
1 tsp pure vanilla extract
1/2 tsp salt

2 large eggs
2 TB unsweetened applesauce

2 TB whole wheat pastry flour
2 TB soy protein
2 TB unsweetened, plain whey powder
1 TB almond meal


1 cup walnut meats - optional


1. Preheat oven to 325 degrees Fahrenheit, and put rack in the lower third of the oven.


2. Line a 9" square baking pan with foil, letting the ends of the foil run up the sides and hang over the edges of the pan.  Do not butter or flour the pan.

3. If using walnuts, spread them on a baking sheet and toast them in the oven until lightly toasted and fragrant, 7-10 minutes.  Cool them and chop coarsely.

4. In a medium-sized saucepan, combine the chocolates and butter and melt over low heat, stirring frequently to prevent scorching.

5. When melted, remove mixture from the heat, and stir in the sweeteners, vanilla, and salt, until well-combined.

6. Stir in the applesauce, then stir in one egg at a time until well-combined.

7. In a small bowl, combine the flours and whisk to combine.  Stir them into the chocolate mixture until well-combined.

8. Add the walnuts, (if desired) and stir well.

9. Pour the batter into the prepared pan, on top of the foil, using a spatula to scrape all of it out of the pot and into the pan.  Spread evenly in the pan.

10. Put pan on a rack in the lower third of the oven and bake until the surface is glossy and smooth, and a toothpick comes out fairly clean from the center, about 40 minutes.  (A few crumbs may stick to it; that's okay.)

11. Cool brownies in the pan, on a rack.  Use the foil to remove the whole batch from the pan when cool.  Cut into squares of the size you desire (keeping in mind that these are rich.)

Brownies will keep in an air-tight container for several days.  Well, theoretically.  

Notes:  You can get pretty darned good sugar-free dark chocolate at Trader Joe's, sweetened with maltitol.  This has become my go-to baking bar, because the price is very good for decent chocolate.  Bob's Red Mill makes all of the other flours, and you can buy them in a well-stocked health food store.  (We can buy them in bulk at Berkeley Bowl or Berkeley Natural Grocer.)  If you want to, you can substitute 1/2 cup of whole wheat pastry flour instead.

Sweeteners:  Erythritol and xylitol are sugar alcohols; low-glycemic, low-calorie, sweeteners suitable for use by diabetics or those with metabolic disorders.  You can easily buy xylitol  at a well-stocked grocery or health-food store.  Erythritol is more readily available on-line.  Stevia is a natural sweetener extracted from the stevia leaf.  It is readily available at grocery stores, including at Trader Joe's.

Thursday, September 8, 2011

High-Protein (Low-Carb) Focaccia Bread


Fresh baguettes and rich, herb-y focaccia; chewy and crispy on the outside, tender and chewy on the inside. Tear a piece off, wipe up the last delicious bits of vinaigrette and fresh tomatoes. Mmmm.... doesn't that sound delicious? And here I am, able to pick up a fresh loaf of either one, so good you can close your eyes and pretend you're in Paris or Italy. Lucky me!

Except, of course, NOT ANY MORE.

Life was looking up - way up - after I invented a high-protein, low-carbohydrate bread recipe. I am now baking a fresh loaf a few times a week, for toast and sandwiches - yummy. However, even that new treat cannot take the place of the way a simple piece of good, chewy bread behaves with pesto slathered on it.

Yes, folks, it was time to do something about it! This recipe I've devised for low-carb focaccia fits the bill; chewy, rich, great alone, used to soak up sauce or as a platform for cheese, Italian cold-cuts, or pesto. It's fantastic fresh out of the oven, and if you have leftovers, you can restore them to close to their fresh-baked consistency with a visit to the oven or toaster-oven.

High-Protein (Low-Carb) Focaccia


Special Equipment: A bread machine - but directions follow at the end if you don't have one.

Dough
1 TB regular (fast-acting, not instant) yeast
1 tsp salt
1 cup vital wheat gluten
3/4 cup whole wheat pastry flour
3/4 cup soy protein
1/4 cup flax meal
1/4 cup plain whey powder
1/4 cup almond meal
1/4 cup grated parmesan or pecorino romano cheese
1/4 cup olive oil
1 1/2 cups water

Topping
3 TB olive oil
1 TB finely chopped fresh rosemary
1 tsp coarse sea salt

Bring all of the ingredients to room temperature, and add them into the loaf pan of a bread machine. Set the machine for "White," "Large," and "Dough." Start the machine, let it run through the mixing and kneading cycles. Check the dough as it comes together; it should be very elastic and almost spongy, without sticking to the sides of the pan. If the machine is complaining, or the dough seems dry, add a little more water. If it is too moist, add a teaspoon of flour or gluten. Repeat as necessary until it is the right consistency. Let the machine run through all of the cycles of kneading and rising.

When the dough has gone through its final rise phase, get out a baking sheet with sides, and put a coating of olive oil all over it. I like to use a small silicone pastry brush; works like a charm, and can be thoroughly cleaned - no more rancid oil in my pastry brush!

Take the dough out of the loaf pan, and, using your hands, coax, smash, stretch, and smear the dough out to cover as much of the pan as possible. Using your finger tips, leave dimples and impressions in the dough to hold the olive oil.

Now, cover the pan and let it go through one more rising. I like to just put another baking sheet over the first, as I hate to waste anything. Let the dough rise until it is doubled again, for about an hour. If it hasn't risen much more, don't worry about it. It will rise some more in the oven.

Meanwhile, finely chop the rosemary and mix it with the olive oil in a very small bowl. Preheat the oven to 425 F. When the dough has risen, and the oven is hot, spread the olive oil/rosemary mixture all over the bread, letting the oil pool slightly in the dimples. If your coarse sea salt is VERY coarse, you can crush it slightly with a mortar and pestle, or with a wooden spoon. Sprinkle the salt evenly over the bread.

Put the pan in the oven and bake it until it is gorgeously golden brown, about 20 minutes. Remove, and eat it - preferably right away! Store any leftovers in an airtight container. As I said earlier, heat up the leftovers in a toaster oven or oven, and they will be restored to almost fresh-baked goodness for as much as a week later.

If you don't have a bread machine: Put the yeast in a large bowl. Heat the water until it is lukewarm (105-115 degrees F), and whisk it into the water until it dissolves. Let the yeast wake up for a few minutes. Meanwhile, whisk together all of the dry ingredients in another large bowl. When the yeast/water mixture is a little foamy, add the olive oil, and then the rest of the dry ingredients. If you are using a stand mixer, use your paddle attachment to combine them well, and then switch to the dough hook and knead the bread for about ten minutes. If you are using your hands, do the same with your hands and a spoon, and knead it until it is quite elastic. Follow directions above for reaching the right consistency. Cover the bowl with a clean dishcloth, and let it rise until it is doubled in size, about an hour and a half. Follow all of the rest of the directions above from there.

Sunday, May 1, 2011

(Sugar-Free, Low-Carb) Breakfast Cheesecake


My friend Mimi is also doing the low-carb thing, which is really great because it gives me someone to talk to about diet stuff, which frankly is the most boring subject on the planet. Seriously; the only thing more tedious than being on a diet is listening to someone else talk about it. And I KNOW you know what I'm talking about, right? Okay, here's an example:

I was at a friend's birthday party in a nice little restaurant. A large number of us were gathered around the table, trying to decide how many charcuterie plates to order. One member of the party started describing all of the crazy diets she'd been on over the years, including one where you ate one food exclusively all day, every day for like a week before switching. She was invited out to dinner to a very, VERY nice restaurant that specialized in duck. Trouble was, it was grape week on her diet, and she was a hardcore dieter; she was not making any exceptions for this meal. She brought along a bunch of grapes, and asked the waiter to plate them for her. I, naturally, asked her if they had charged her a "grapeage" fee.

This yummy breakfast cheesecake is full of protein and calcium, and completely delicious even for those of you not setting limits these days. Naturally, they are not just good for breakfast; there's lunch, snackage, and dessert. There really is only one problem with these at our house: Johanna loves them so much, it's not easy to get one for myself in the morning!

Mimi R., this one's for you.


Breakfast Cheesecake


2 cups full fat cottage cheese or ricotta
8 ounces soft/whipped full fat or low fat creamcheese, at room temperature
1/2 cup whole milk greek yogurt
1/3 cup erythritol
4 tiny scoops stevia
2 TB xylitol
1 generous pinch salt
2 tsp vanilla OR 1/2 tsp almond extract
zest of 1 orange or 1 lemon
3 large eggs

If you don't have erythritol, substitute 1/3 cup xylitol in TOTAL. If you don't worry about sugar, substitute 1/2 a cup of white sugar for all of the sweeteners.

Preheat oven to 325 F

1. Set 6-8 6 ounce ramekins or custard cups in a high sided baking pan (at least 2")

2. Pour the cottage cheese into the bowl of your food processor and whirl until smooth.

3. Add the cream cheese and process until smooth, scraping down the sides of the bowl occasionally.

4. Add the yoghurt, sweeteners, salt and extracts and whirl until smooth.

5. Add the eggs and zest and whirl until just incorporated.

6. Pour the batter into the cups. Then carefully pour hot water into the pan around the cups, until it comes halfway up their sides.

7. Bake the cakes for about 40-45 minutes, until the sides are firm and the centers are just barely firm at the center.

Tuesday, March 8, 2011

Sugar-Free Sweet Potato Bread


Sweet Potatoes, how do I love thee; luscious, moist, flavorful, low glycemic, packed with vitamins and fiber - sweet! So, it naturally followed that I should develop some new, recipes using this wonder food. This is very, very good; moist and rich tasting.


1 1/4 cup/12 ounces cooked sweet potato, mashed
1/2 cup water
1 large egg
1 extra large egg
1 1/2 tsp vanilla extract OR 1 TB bourbon
2 cups whole wheat pastry flour, (minus 4 TB)
2-3 TB flax meal (optional)
1 TB soy protein (optional)
1 TB whey powder (optional)
1/3 cup xylitol
4 1/2 tiny scoops stevia
3 TB +1 tsp erythritol ("Zero")
1 tsp salt
1 tsp baking soda
1 1/2 tsp cinnamon
1/4 tsp ground cloves
1/2 cup coarsely chopped pecans

If you don't have access to erythritol, raise the xylitol to a scant 1/2 cup.

If sugar is not a problem for you, substitute 3/4 cup of sugar for all of the sweeteners.

Preheat the oven to 350F. Grease a loaf pan. In a large bowl, mash the sweet potatoes well with a potato masher, and whisk in the water. Then stir in the eggs and vanilla or bourbon until well blended.

If you are using the supplemental proteins and flax powder, measure the 2-3 TB of flax meal, 1 TB of soy protein, and 1 TB of whey powder, then fill the rest of the measure with the whole wheat pastry flour. In a medium sized bowl, add this, plus the second cup of flour, the baking soda, the salt, the spices, and all of the sweeteners, and whisk the ingredients to blend.

Add the dry ingredients to the wet and stir well. Add the nuts and blend. Spoon into the loaf pan, using a spatula to get all of the batter, and bake for about an hour. Run a butter knife around the edges of the pan to loosen the loaf, then cool on a rack. This is quite delicious toasted, served with sweet butter or toasted nut butters.

Notes from Christine: You may have a bunch of questions as to why I've given the substitutions I have. Why whole wheat pastry flour? Pastry flour is lower in gluten than regular flour, so it makes a less dense bread. This way you get the whole grains and the reduced carbohydrates, but without the heaviness. Why one extra large egg? When I have made similar breads before using 100% whole wheat, it didn't rise as much as it did with all unbleached refined flour, or 50/50. When I baked this version, I happened to have one extra large egg and one large egg on hand, and this is what I used. Voila; it rose to perky heights! Why the flax meal? Flax meal is full of omega 3 fatty acids, which actively convert "bad" cholesterol into "good" cholesterol in your body. Here is a lovely way to sneak them into something yummy. Also, if you are cutting carbs, this substitutes a lower carb ingredient. Why the xylitol, stevia and erythritol? As I have written in previous posts, stevia is a calorie-free, completely natural sweetener extracted from stevia leaves. However, it has a funky aftertaste. Therefore, it is best to mix it with another sweetener. Xylitol is a sugar alcohol, which the body metabolizes differently than sugar. It is 40% lower in calories, and metabolized 75% more slowly than cane sugar. I like those numbers! Plus, it is actually good for your teeth. However, it is extracted in weird and yucky ways from wood, so I'm not thrilled. Erythritol (marketed as Wholesome Sweeteners Zero) is my new darling; it is available made from organic sugar which has been fermented, with zero calories and zero on the glycemic index - wow! But, it is only 60% as sweet as sugar, and is wickedly expensive. So, ta da! Mix them together!

Whey powder is available from well-stocked grocery and natural food stores. Berkeley Bowl carries whey powder and flax meal in a refrigerated case near the bulk food section.