Monday, June 6, 2011

Sugar-Free Strawberry Rhubarb Jam


I confess; when my friend Mimi (who's also living a low-carb life) told me that she and her friends had made 75 jars of strawberry jam for a fundraiser at our elementary school, I wound up feeling a teeny bit sorry for myself. You see, I love that jam. There's just nothing like homemade jam, and homemade strawberry jam - well, you know. And since I'm living a sugar-free life, I just couldn't see myself eating any of that lovely jam, or even making jam again. Sniff. Apricot. Sniff. Plum Butter. Sniff. Strawberry Rhubarb. Sniff, sniff.

And then I thought - ha! Of course - I can make my own jam! I've seen ads for sugar-free jam, but the commercial products just sound so.... fake. And unappetizing. But every sugar-free thing I've made so far has been, well, FABULOUS. (My Mama told me never to brag, but well, you know - "no brag, just fact."

So, I went out and bought 7 quarts of gorgeous organic Swanton Berry Farm fruits, a big bunch of fresh rhubarb, looked at recipes, decided what my ratio of sweeteners ought to be, and set to work. I admit, I was nervous. What if it was lousy, and I'd wasted all that lovely fruit? I made one batch, using about half of the strawberries and all of the rhubarb. OMG, it was amazing, it was so good. So as soon as I canned it, I plowed back in and made an all-strawberry batch. The whole thing took hardly any time at all, and afterwards, I felt like I had a treasure-trove of rubies. Ahhh.

Now I just have to figure out how to make low-carbohydrate bread to go with it....


Sugar-Free Strawberry Rhubarb Jam

You will need:

11-12 8 oz (half pint) canning jars, lids and rings
8 quart heavy stockpot for the jam
Another 8 quart (or larger)stockpot for sterilizing jars
1 box pectin for low-sugar jams (I use Pomona brand)
wide-mouthed funnel (optional, but super useful)

4 cups rhubarb, (app. 2 lbs) washed, dried, cut crosswise into 1/2" slices
6 cups strawberries, (app. 3-4 pint baskets) washed, dried, hulled, and cut into quarters
3 TB lemon juice
5 tsp calcium water (from pectin kit - or follow instructions from package)

2 cups erythritol
1 1/3 cups xylitol
28 tiny scoops stevia
5 tsp low sugar pectin (or follow instructions from package)


If the jars are brand new, wash them and the rings and lids to remove any chemicals left from processing. If they have been sitting in the basement, check them for dust, and wash off any you find. Put the jars and rings into a very large stockpot or canning pot and fill with hot water to cover by an inch or two. Put them on the rear burner of the stove over high heat and bring them to a boil. When they come to a boil, turn the heat down and keep them hot and ready.

Following the instructions in your low sugar pectin kit, make calcium water. (I use Pomona brand.)

Prepare the fruit: wash it, dry it, cut it up (1/2 if small, 1/4 if medium, 1/8 if large) and put it in an 8 quart, heavy stock pot, along with the lemon juice and calcium water. Put it on the stove and cook over medium heat, stirring occasionally, until it comes to a full boil and the fruit is softened. (The rhubarb will take longer than the strawberries.)

Meanwhile, measure the sweeteners and the pectin into a medium sized bowl and whisk them all well to combine.

When the fruit is ready, get a long-handled wooden spoon ready, and gradually add the sweetener mix to the hot fruit, stirring constantly as you pour in the sweeteners. Stir well and frequently to combine the pectin with the fruit and prevent lumping. Bring it back to a full boil. When it looks lovely and thick, turn off the heat and get ready to can. (Don't worry if it isn't as thick as jam; it thickens as it cools.)

Clear a good sized work surface near the stove, and cover it with clean dishtowels (preferably ones you don't care about!)

Turn the heat off under the pot of jars and move it to the front of the stove so you can reach them easily, and move the jam to the back of the stove so you don't get water into it by accident. (Put the lid on the pot if necessary.) Using tongs or a jar lifter in your dominant hand, and a clean dishtowel in your other hand, carefully remove the lids and rings and drain them on the towels. Lift each jar out of the hot water, dump the hot water back into the pot, and carefully guide and transport the hot jar over to the towels. Turn it upside down to drain out the extra water. Repeat until all of the jars are drained and ready.

Turn the heat back on high underneath the pot that the jars came out of, and bring it back to a full boil while you can.

Now, again using your tongs (or a clean towel, oven mitts, or tough hands!) turn the jars right side up, and line them up to be ready to fill. If you have a wide-mouthed jar funnel (which I so highly recommend - available at any good hardware store, Bed Bath and Beyond, well stocked grocery stores, etc., for less than $5) put it on top of one of the jars.

Grab your best ladle, and bring the pot of hot jam over to your work surface. Carefully fill each jar, leaving 1/4" of space at the top. If you have a wide-mouthed funnel, the bottom should come to just the right spot. If you don't, do your best! If necessary, spoon some out to reach the right level. After you have filled all your jars, use a clean, moist towel to wipe the ring area and the top surface of the jars clean. If you have less than a full jar of jam, put that one straight into use and don't bother to can it.

Put the lids on, followed by the screw tops, and screw them down.

When the water bath comes back to a full boil, and again using your tongs, carefully lower the jars back in one at a time. Boil them all for 10 full minutes, then remove them with your tongs and let them cool on the toweled work area. If necessary, work in batches.

Thursday, May 26, 2011

Cider-Cured Pork Chops


I'm getting a little nervous..... I cooked the last two packets of pork chops from my pig to make this recipe, and for Easter had the next to the last of the hams. I have a few more packages of smoked hocks and some of the sausages I've been making (and inhaling since I went on the Atkins diet) left, but it's looking a bit grim. Looks like it's time to sign up for another pig from my rancher friend, Mary Pettis Sarley (barngoddess@dishmail.net)

This recipe, from the now defunct 42 Degrees Restaurant in San Francisco, is a super fine way to cook a pork chop. Brining, which brings flavor deep inside the cells of the meat, also keeps the meat very moist during cooking. This cooking technique became very popular in the 1990's, as farmers bred pigs to be very lean in an effort to continue to keep pork popular as the anti-animal fat diet movement ramped up. Brining ensured that this super lean meat didn't turn into a piece of cardboard in the frying pan. Mind you, moistness and fat are not an issue in the super-delicious Duroc breed of pigs I buy from Mary. However, this recipe delivers such deep, rich flavor, a caramelized surface, and of course, guaranteed moistness, that it's worth using it even when you have top quality meat. Oh, baby. A fine way to honor the last offerings of a delicious pig!

42 DEGREES CIDER-CURED PORK CHOPS

Ingredients:
4 Center cut pork loin chops, 1 1/4-1/1/2 inches thick (bone in or not)
Olive Oil

Brine:
4 cups water
2 cups hard cider
1/2 cup salt
1/2 cup brown sugar
10 whole peppercorns
4 bay leaves
1/2 bunch fresh thyme
1 yellow onion, chopped
1 carrot, peeled and chopped
1 celery rib, chopped
1 apple, peeled and chopped

To make the brine: Combine all the brine ingredients in a large saucepan. Bring to a full boil over high heat, then remove from heat and let cool. When cool, refrigerate until cold. (If you put meat in warm brine, they will absorb too much of the salt.)

In a large glass or stainless steel container with a lid, add the pork chops to the cold brine. Weigh down the meat with a plate if necessary to keep the chops completely submerged. Refrigerate for at least one, up to two days.

To cook: Remove the chops from the brine and pat them dry, and allow them to come to room temperature. Discard the brine. Heat 2 heavy skillets (preferably cast iron) over moderately high heat. Add just enough oil to coat the bottom of the skillets. When the skillets are hot, add the chops and reduce heat to moderately low. Cook for about 10 minutes (meat should show caramelization), then turn and cook until the chops are no longer very pink at the bone, about 10 more minutes. Turn again as needed. If you have a digital meat thermometer, test the meat in several spots, especially near the bone. An internal temperature of 150 degrees Fahrenheit is ideal. Remove from heat, and enjoy!

To drink: delicious with the rest of the hard cider, a bottle of Prosecco, or a nice Riesling.

Side dishes: oven baked sweet potato fries would be mighty fine!

Friday, May 13, 2011

Roasted Asparagus


We're now deep into Spring here, and you know what that means, right? As much asparagus as we can stuff into ourselves! Ever since I read about roasting asparagus a few years ago, it has become pretty much the only way I cook it, because the roasting concentrates the delicious sweetness of the stalk. Added bonuses about this method are: no nutrients or flavors are lost to the cooking water, it's harder to overcook to that unappealing khaki green stage, and your stovetop is free to make the main course while the vegetable cooks. But wait, there's more - if you fry a couple of eggs and put them on top, you have a main course, too!

Roasted Asparagus

As much asparagus as you want to eat (choose the freshest, firmest stalks you can find)
Olive oil
Coarse sea salt
Fresh ground pepper

optional: fresh eggs

Preheat the oven to 450 F.

Wash and dry the asparagus, and, holding the center of the stalk in one hand and the cut end in the other, bend the cut end until it snaps off. (Save the ends for the Total Cheapskate's Cream of Asparagus Soup recipe in the next post!)

Heap the asparagus on a rimmed baking sheet, and drizzle olive oil all over it. Using your hands, make sure that each spear is coated with the olive oil. Spread the asparagus out on the baking pan in a single layer (use an additional pan as needed). Sprinkle generously with the sea salt - don't be shy, most of it will fall off during cooking, as well as a generous grind of black pepper.

Put the baking dish in the center of the oven, and roast until just tender; if a fork easily pierces the stalks, it is done. This takes about 15-20 minutes, depending on how fat and/or cold the asparagus is.

If you are making a main course of this, fry two eggs per person. Season them well with salt and pepper, and cook until the whites are set and some portion of the yolk is still liquid. The yolks make a nice sauce which coats the stalks. If you like, you can sprinkle some freshly grated parmesan on as well.

Notes from Christine: "Why am I snapping the ends of the stalks instead of using my chef's knife?" Your goal is eliminate the tough, fibrous, inedible parts of the stalk, while not wasting any of the tender parts. Each stalk has an invisible line that separates tough from tender; it is in a different spot on each stalk. When you snap it, it naturally breaks in exactly the right spot.

Thursday, May 12, 2011

Total Cheapskate Asparagus Soup


My step-grandmother, Edda, was the ch - oops, excuse me, the most frugal person I've ever met in my life - and that is saying plenty. (I come from a long line of Yankees and Germans, so I know what I'm talking about!) When she died and we went through her cupboards, we found that she had the largest collection of used tin foil, saran wrap, rubber bands, jars, cans, and waxed paper known in the civilized world. God, I miss her.

So one of the things she turned me on to was how to use the cast-off ends of the asparagus spears to make a lovely soup. You know how you have to bend them at the base until the tough parts snap off? Doesn't it just kill you to throw away all of that "perfectly good asparagus?" It does me! So, here you are, about to roast four pounds of organic, early season local asparagus. Even at bargain prices you'd be pitching over $5 worth of asparagus into the compost heap.

Fortunately, you saved the snapped off tips when you made the roasted asparagus, as I recommended, yes? So here's what to do with them: (and you can do this while the asparagus roasts, and then bag the results aside in the fridge to make the soup for tomorrow's lunch, btw).... but, back to the matter at hand:

Using the sharpest chef's knife you have, slice off the least bit of the old, cut end that you can easily cut through; the goal is to eliminate what is too tough to eat, but to save as much of the stalk as possible for the soup. If it's too tough to cut fairly easily, move your knife up the piece and try again until you can. One of the clues you will get is how much of the stalk has turned purplish-white; the more it trends towards that color, the more likely it is to be very tough. A few pieces will be so tough that they go straight into the compost, along with the cast-off trimmings.

Take the remaining piece of stalk, and using a vegetable peeler, peel off the skin very thinly all the way around. Yes, this all takes a little while, but if you are frugal, and it's nice asparagus, it's worth it, right?

Once you have finished your trimming and peeling, chop up what you have left crosswise into lengths of about 1/4 - 1/2" inches.

Now, put the proceeds into a saucepan big enough to hold it with room to spare, and fill it just to cover with chicken or vegetable broth. (I like to use Better Than Bouillon Organic; very tasty and very convenient. It comes in a jar, and you use a teaspoon per cup of water. I use a generous teaspoonful for this.)

Put the pan over medium heat and boil the asparagus until it is just tender. Then, using either an immersion blender (my favorite - it's this wand thingie that you use to blend right in the pan) or a regular blender or food processor, whirl it up until it's pureed; it's okay if there are a few chunks left for texture. Now, add just enough heavy cream to make it all come together in luxury, and season it to taste with freshly ground pepper (and salt, if you need more) and whirl it up until it's all blended. Check and adjust the seasoning, as needed.

Voila! Total Cheapskate's Asparagus Soup. (Frankly, I will often make a batch while everyone is out of the house, and eat the whole thing for my lunch. Yum.)

Monday, May 2, 2011

Flourless Chocolate Cake


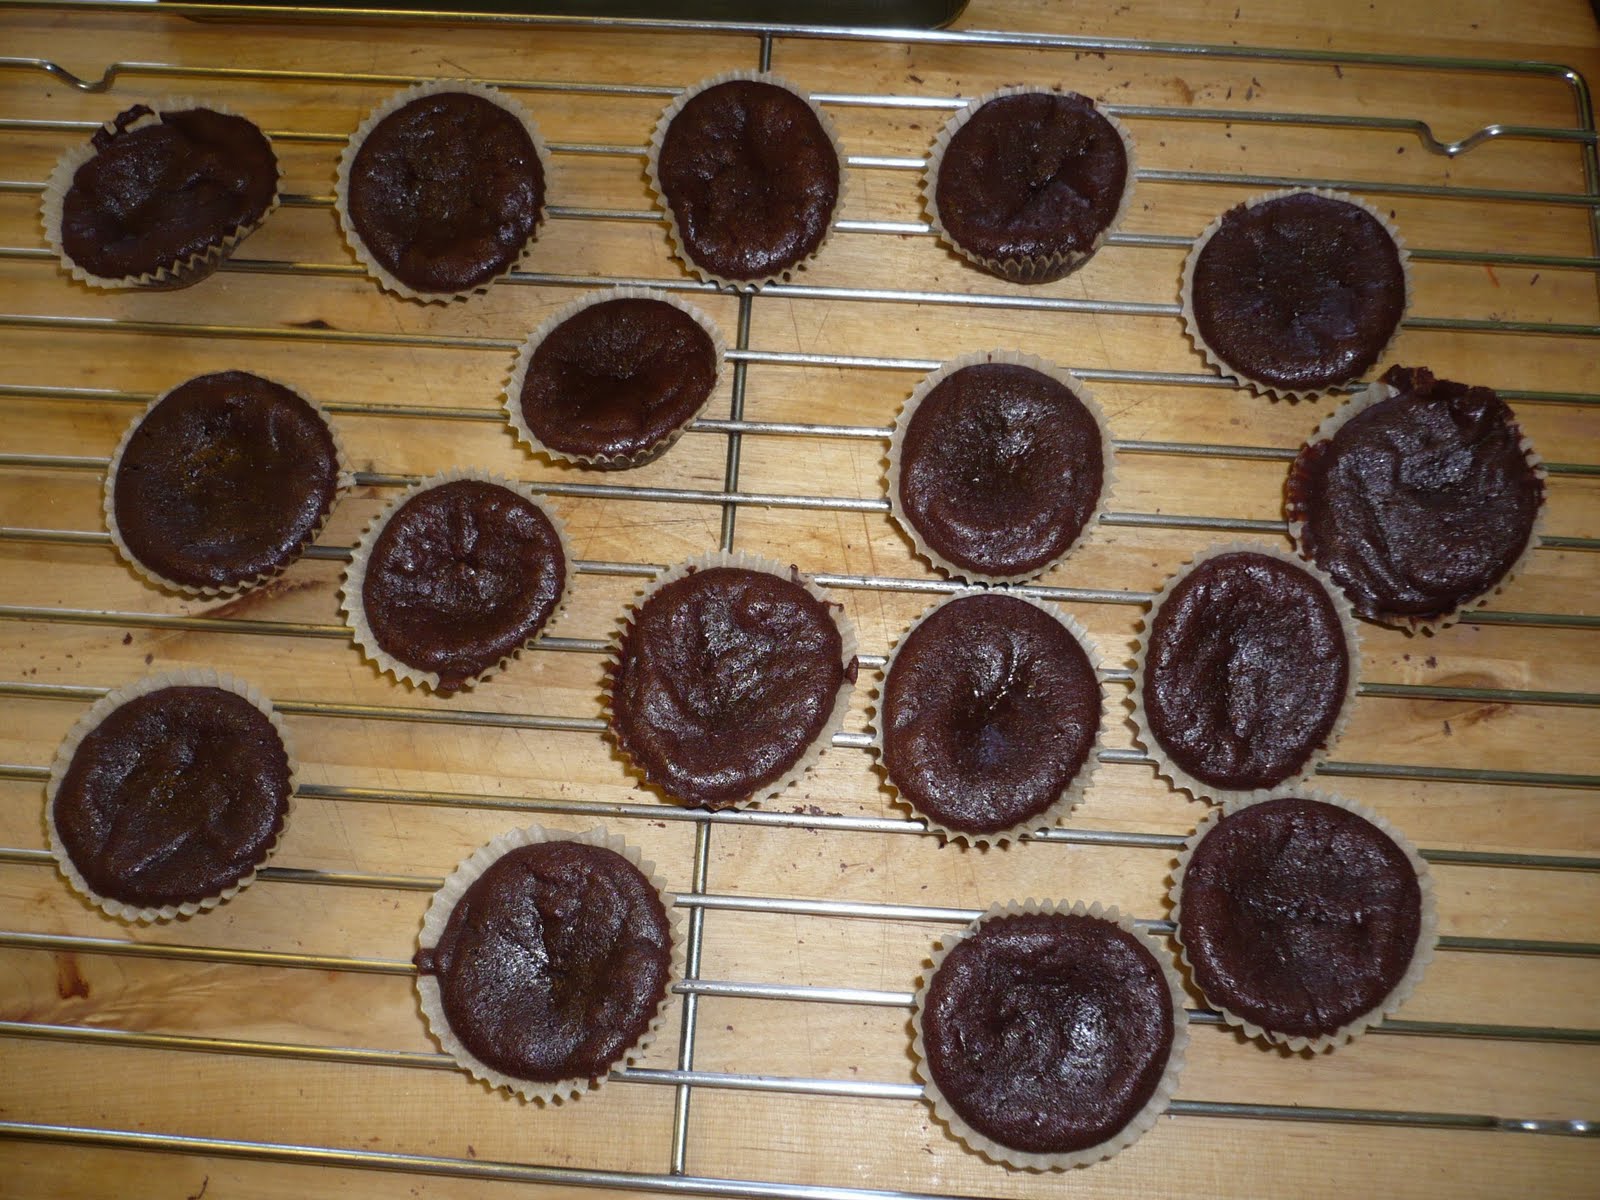
It's Teacher Appreciation Week at Johanna's school. Naturally, I agonized; the new peanut butter cookies I'm developing, (next post!) mini - breakfast cheesecakes? I've been eying this flourless chocolate cake recipe in Gourmet Cookbook for a while, after my friend Kate brought it to my attention. The recipe calls for making it in a springform pan, but since I'm baking for 30+ teachers, aides, staff, librarians and such, it had the potential for a big messy scene, where 10 people got a piece and 20 didn't. So, I thought I'd try little muffin cups and pray it wasn't a disaster. Hurray! It worked perfectly; 41 cute lil' bites, instead of one big cake. (p.s. Top Secret tip: this is spectacularly delicious, but incredibly easy. This is a perfect "company" cake, or to bring to a party!)


Flourless Chocolate Cake

from The Gourmet Cookbook

serves 10-12 in full-sized slices, makes about 40 mini-cupcake bites

8 oz good quality bittersweet chocolate (not unsweetened) coarsely chopped
1/2 pound (2 sticks) unsalted butter
1 1/2 cups sugar
6 large eggs
1 cup unsweetened cocoa powder, plus additional for dusting

Special Equipment: a 10" (26 centimeter) springform pan, or paper muffin cups and 2 muffin pans

1. Put a rack in the middle of the oven and preheat to 350 F. If using the springform, butter it, lie with parchment paper, and butter the paper. If using muffin cups, place them in your muffin tins. You can cook in batches if you have more batter than muffin tins.

2. Melt chocolate with butter in a medium metal bowl set over a saucepan of barely simmering water, stirring until smooth.

3. Remove bowl from heat, and whisk in sugar.

4. Add eggs one at a time, whisking well after each addition.

5. Sift the cocoa powder over the chocolate mixture and whisk until just combined.

6. Pour the batter into the pan, or spoon into the muffin cups.

7. Bake until top has formed a thin crust and a wooden pick or skewer inserted in the center comes out with moist crumbs adhering to it, 30-40 minutes for the big cake. Mini-muffins took about 15 minutes, so larger muffins would probably take 20-25.

8. Cool cake in the pan on a rack for 10 minutes, then remove the side of the pan. Invert the cake onto a plate and reinvert onto rack to cool completely. Dust cake with cocoa powder just before serving.

Sunday, May 1, 2011

(Sugar-Free, Low-Carb) Breakfast Cheesecake


My friend Mimi is also doing the low-carb thing, which is really great because it gives me someone to talk to about diet stuff, which frankly is the most boring subject on the planet. Seriously; the only thing more tedious than being on a diet is listening to someone else talk about it. And I KNOW you know what I'm talking about, right? Okay, here's an example:

I was at a friend's birthday party in a nice little restaurant. A large number of us were gathered around the table, trying to decide how many charcuterie plates to order. One member of the party started describing all of the crazy diets she'd been on over the years, including one where you ate one food exclusively all day, every day for like a week before switching. She was invited out to dinner to a very, VERY nice restaurant that specialized in duck. Trouble was, it was grape week on her diet, and she was a hardcore dieter; she was not making any exceptions for this meal. She brought along a bunch of grapes, and asked the waiter to plate them for her. I, naturally, asked her if they had charged her a "grapeage" fee.

This yummy breakfast cheesecake is full of protein and calcium, and completely delicious even for those of you not setting limits these days. Naturally, they are not just good for breakfast; there's lunch, snackage, and dessert. There really is only one problem with these at our house: Johanna loves them so much, it's not easy to get one for myself in the morning!

Mimi R., this one's for you.


Breakfast Cheesecake


2 cups full fat cottage cheese or ricotta
8 ounces soft/whipped full fat or low fat creamcheese, at room temperature
1/2 cup whole milk greek yogurt
1/3 cup erythritol
4 tiny scoops stevia
2 TB xylitol
1 generous pinch salt
2 tsp vanilla OR 1/2 tsp almond extract
zest of 1 orange or 1 lemon
3 large eggs

If you don't have erythritol, substitute 1/3 cup xylitol in TOTAL. If you don't worry about sugar, substitute 1/2 a cup of white sugar for all of the sweeteners.

Preheat oven to 325 F

1. Set 6-8 6 ounce ramekins or custard cups in a high sided baking pan (at least 2")

2. Pour the cottage cheese into the bowl of your food processor and whirl until smooth.

3. Add the cream cheese and process until smooth, scraping down the sides of the bowl occasionally.

4. Add the yoghurt, sweeteners, salt and extracts and whirl until smooth.

5. Add the eggs and zest and whirl until just incorporated.

6. Pour the batter into the cups. Then carefully pour hot water into the pan around the cups, until it comes halfway up their sides.

7. Bake the cakes for about 40-45 minutes, until the sides are firm and the centers are just barely firm at the center.

Thursday, April 28, 2011

Oven-Baked Sweet Potato Fries


We were heading off to Lake Tahoe for our annual Ager Family ski trip, and planning out the menu and shopping list. Every year, Joel and I go to the Truckee Safeway and buy about a hundred dollars worth of rib-eye steaks to barbecue, roast a bunch of russet potatoes, and make a big salad. But this year, there would be no baked potatoes for "Atkins Girl"; amazingly, potatoes are higher on the glycemic index than pure sugar - go figure! Burgers and Fries, no more. Sigh. Then I remembered: Sweet Potato Fries! Yay! I can have those! As I have gone on and on about before, sweet potatoes, despite their tasty, sweet nature, are low on the glycemic index, meaning that your body digests them into blood sugar slowly. Plus, they are PACKED with nutrients. And best of all, they are DELICIOUS. Bring 'em on!

So, dinner time came around. Best steaks ever. Plenty of baked potatoes (for everybody else) and I made a batch of sweet potato fries; guess which ones were wiped out?

Oven-Baked Sweet Potato Fries

* 2 pounds orange sweet potatoes (aka yams) about 3 large ones
* olive oil (about 1/4 cup)
* 1 Tbsp salt
* 1-2 Tbsp spice, spice blend, or spice combination of your choice: cumin, za'atar, chipotle powder, smoked paprika, Chinese five-spice, garam masala, cayenne, black pepper, cinnamon, chiles, Cajun seasoning, etc.

Pre-heat the oven to 450 F

Wash, dry, and trim off the ends of the potatoes, and remove any obvious blemishes.

Cut the potatoes in half lengthwise, then, laying the flat side down, cut each half into 4-8 wedges, depending on how big the potato is. The thinner the wedge, the more crispy it will be. If you like them more soft, make them bigger. If they are really long, cut them in half crosswise as well.

Put the wedges in a large bowl and drizzle them with the olive oil, then, using tongs, toss well to coat. Sprinkle them all over with the salt and spices, and toss well again until the seasoning coats the the wedges evenly.

Lay the wedges in a single layer on a large baking dish, being careful not to crowd too much. (If you crowd them, they won't brown as well, and will be more squishy than fry-like). If it is overly crowded, add a second pan.

Bake them for about 15-20 minutes, then, using a spatula, turn them all over. Return to the oven for another 15 or so minutes. When they are golden brown and tender, they are ready.